I love using Google Docs with the Google Classroom. It’s easy to create a template in Google Docs and then create a copy for every student in the Google Classroom. The advantage to this versus having them create their own Google Doc is it allows you to pop into their Google Doc and see their progress in real time.
Advantages of using Google Docs:
- You can view your students edit history on the document. You can see anything they typed or added then deleted. It also allows you to see if anyone else has contributed to the document.
- Click on the share button to see if they have invited anyone else to edit their Google Doc.
- I have students do peer workshops on their essays or creative stories by inviting their workshop members to suggest on their Google Doc. Their workshop members can then leave their feedback as comments. I provide them with a list of things to look for and comment on during the workshop.
- I can also leave the students feedback in the form of comments.
- When I have students revise it and turn in a final draft I have them highlight everything they changed so I can easily track the changes. Of course you can also go the edit history to see changes.
Here is how to set up the Google Doc in the Google Classroom.
1.) Setup the Google Doc the way you want it. It can be simple with just the prompt or you can have the prompt on one page then the MLA format template on the next page. Here is an example of a simple prompt setup:
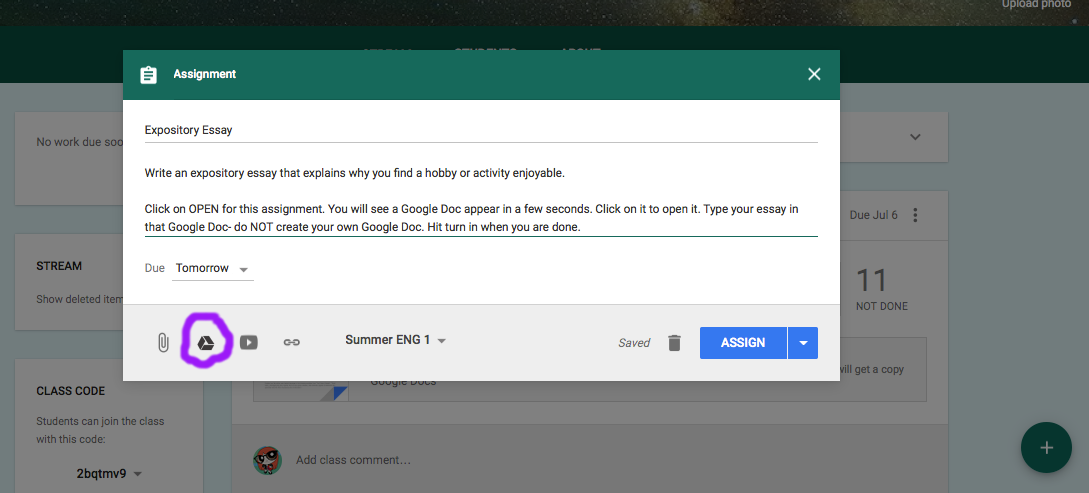
2.) Create the assignment in the Google Classroom. Click on the “Attach Google Drive Item” button.
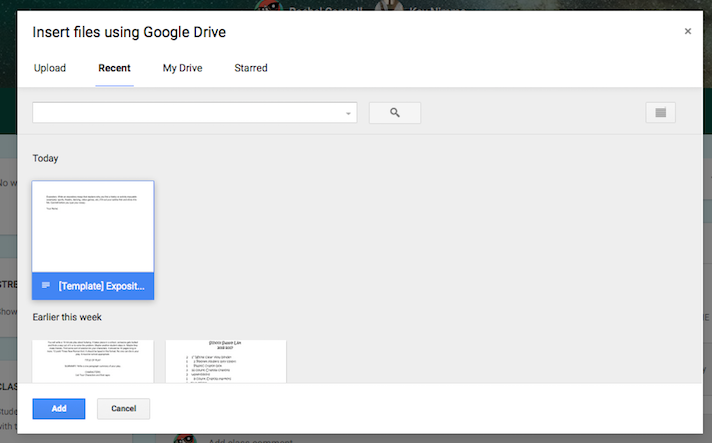
3) Find the Google Doc in your Google Drive and add it.
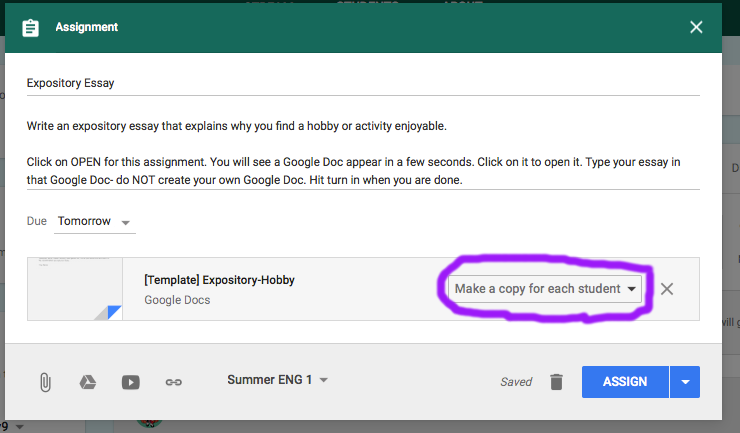
4) Change the setting to “Make a copy for each student.”
5) Then Click “Assign” and you are done!
They sky is the limit as to how you setup the Google Doc. Add images, add the full instructions, list of topics, etc. It’s an easy way to keep track of students progress before they turn it in to make sure they are actually working on it in class or at home. Google Docs is a staple in my English classroom.


